 Save
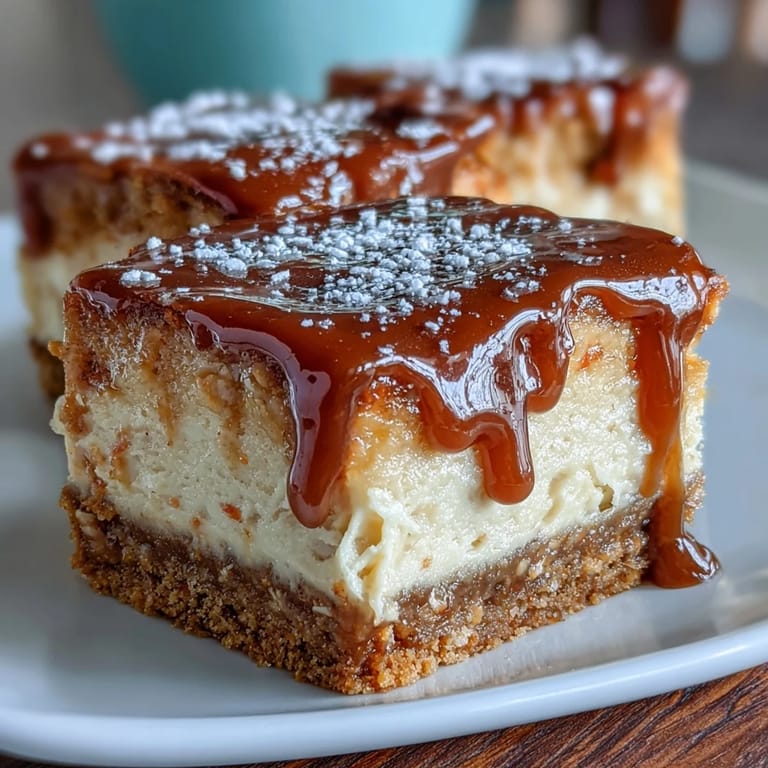
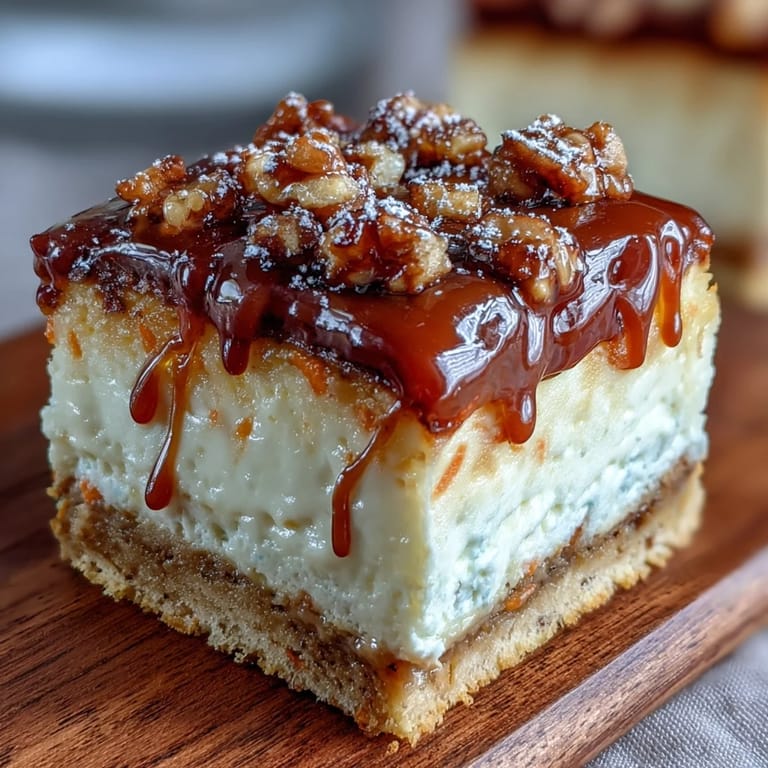
Save My sister called me in a panic the week before Easter, asking if I could bring something special to our family brunch. She wanted carrot cake but also mentioned how much she loved cheesecake—as if asking me to choose. I hung up thinking there had to be a way to give her both, and that's when these bars came to life in my kitchen. The first batch was a little tentative, swirls that didn't quite cooperate, but the moment everyone tasted that creamy cheesecake cutting through the warm spiced cake, I knew I'd figured out something worth keeping.
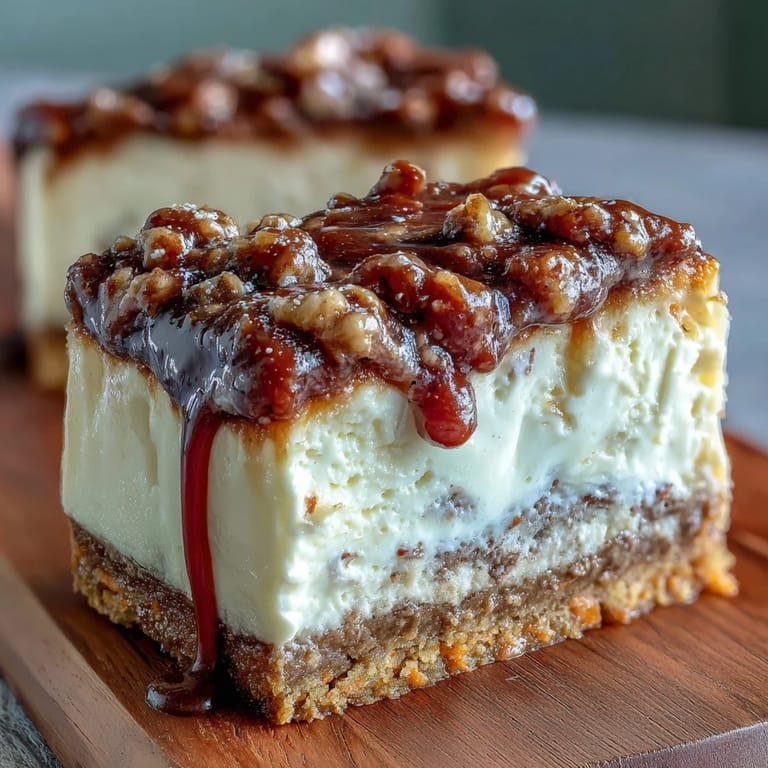
I brought these to a potluck last spring, still nervous about how they'd travel, and watched three people go back for seconds before the main course was even served. One friend asked for the recipe on the spot, and another mentioned bringing them to a baby shower the following month. That's when I realized these bars had crossed over from being a solution to a problem into something that people actually request by name.
Ingredients
- All-purpose flour: The foundation for your carrot cake layer—measure it by spooning into your measuring cup and leveling off to avoid packing it down, which can make the cake dense.
- Baking powder and baking soda: These lift the carrot cake while the cheesecake stays creamy; don't skip or reduce them or your bars will feel heavy.
- Ground cinnamon and ginger: These warm spices are what make people say this tastes like home—I've learned that fresh spices make a noticeable difference, so check those containers.
- Granulated and brown sugar: The combination creates moisture and depth; brown sugar especially keeps these bars tender even after a few days in the fridge.
- Eggs: Use them at room temperature so they blend smoothly into both the cake and cheesecake layers without creating lumps.
- Vegetable oil: This keeps the carrot cake moist and tender in a way butter sometimes doesn't; it's the secret to bars that don't dry out.
- Grated carrots: Grate them finely so they distribute evenly and don't create any dry spots; roughly grated carrots can make texture uneven.
- Walnuts or pecans: Optional but they add a subtle crunch that balances the creamy cheesecake beautifully; toast them lightly first for deeper flavor.
- Cream cheese: Soften it fully at room temperature—cold cream cheese won't blend smoothly and you'll end up with lumps in your frosting and cheesecake layer.
- Powdered sugar for frosting: Sift it if you have time to avoid any gritty texture in your final frosting.
- Unsalted butter: Let it soften alongside the cream cheese so they blend into a smooth, luxurious frosting.
Tired of Takeout? 🥡
Get 10 meals you can make faster than delivery arrives. Seriously.
One email. No spam. Unsubscribe anytime.
Instructions
- Prepare your workspace:
- Preheat your oven to 350°F and line your 8-inch square pan with parchment paper, leaving some overhang on the sides so you can lift the whole thing out later without struggling. This step saves you from cursing while trying to cut squares from a stuck cake.
- Build your dry ingredients:
- Whisk together the flour, baking powder, baking soda, cinnamon, ginger, and salt in a medium bowl; this distributes the leavening and spices evenly so every bite tastes consistent. Set it aside and don't overthink it.
- Cream your wet mixture:
- In a large bowl, whisk the granulated sugar, brown sugar, eggs, oil, and vanilla together until it looks smooth and slightly pale; this should take about a minute. You're creating an emulsion that will help the cake rise and stay moist.
- Combine wet and dry:
- Stir the grated carrots and nuts into your wet mixture first, then gently fold in the flour mixture just until combined—don't overmix or you'll develop gluten and end up with a tough cake. The batter should look rough and chunky, not smooth.
- Spread the base:
- Pour about two-thirds of the carrot cake batter into your prepared pan and spread it in an even layer; this creates a sturdy foundation for the cheesecake to rest on. Use a spatula to smooth it out gently.
- Make your cheesecake layer:
- Beat the softened cream cheese and sugar together until completely smooth, then add the egg and vanilla and mix until just combined. The whole process takes about two minutes; stop as soon as you don't see streaks of cream cheese.
- Layer with intention:
- Pour the cheesecake mixture gently over the carrot cake base and spread it in an even layer; this protective layer will keep your carrot cake from drying out during baking. Be gentle so you don't disturb the crumbs below.
- Create the marbled top:
- Dollop spoonfuls of the remaining carrot cake batter over the cheesecake, then take a knife and swirl it gently through the layers in a few directions to create that pretty marbled effect. Don't overdo it or you'll just blend everything together into brown.
- Bake with patience:
- Bake for 40 to 45 minutes—the center should jiggle just slightly when you gently shake the pan, and a toothpick should come out with a few moist crumbs clinging to it. The carryover cooking while it cools will finish the job.
- Cool completely:
- Let the bars cool in the pan on a rack for at least an hour, until they're completely room temperature; this prevents the frosting from melting off. Patience here makes frosting so much easier.
- Frost with cream cheese:
- Beat the softened cream cheese and butter together until light and fluffy, then gradually add the powdered sugar and vanilla, adding milk just until you reach a spreadable consistency. Spread this over the cooled bars in an even layer.
- Final chill:
- Refrigerate for at least an hour before slicing into 16 squares; the cold helps everything set and makes the bars hold their shape when you cut them. Use a warm, damp knife for cleaner cuts.
 Save
Save There's something deeply satisfying about cutting into these bars and seeing all three distinct layers stacked perfectly—the orange flecked cake, the creamy middle, and that swirl on top. My mom asked me to make them again last summer, and now they show up at almost every gathering our family has.
The Magic of Marbling
The swirl on top isn't just for looks, though it certainly makes these bars feel fancier than they are. When you drag a knife through those two batters, you're creating pockets of different textures and flavors that will surprise you with every single bite. I've found that a gentle hand makes the prettiest pattern—aggressive swirling just turns everything into muddy brown, which tastes fine but looks less elegant. The knife should barely kiss the surface, creating those dramatic lines that catch the light when you plate them.
Making Ahead and Storage
These bars actually improve after a day or two because the flavors have time to meld together and the texture becomes even creamier. I often make them on a Wednesday for a weekend gathering, storing them in an airtight container in the refrigerator where they'll keep beautifully for up to five days. You can even freeze them for up to a month if you wrap them well, though I've never actually managed to leave them uneaten that long.
Flavor Variations and Swaps
Once you understand how these bars work, you can play around with what you put into them. I've added raisins plumped in warm water, swapped the walnuts for pecans, and even tried a pinch of nutmeg alongside the cinnamon for something earthier. If you're baking for someone with a nut allergy, simply omit them entirely—the bars are just as delicious and the texture actually highlights the cheesecake more prominently.
- Try adding a quarter cup of finely chopped pineapple or crushed freeze-dried pineapple to the carrot cake batter for a tropical twist.
- A hint of maple extract in the frosting pairs beautifully with these bars if you want something slightly different without changing the structure.
- For nut-free celebrations, keep everything else exactly the same and no one will miss what isn't there.
 Save
Save These bars have become my answer to the question of how to make someone feel celebrated with a single dessert. They're the kind of thing that makes you look like you spent all day in the kitchen when really you just learned the secret of layering things thoughtfully.
Recipe FAQs
- → Can I substitute nuts in the bars?
Yes, walnuts can be replaced with pecans or omitted entirely for a nut-free option without affecting the texture significantly.
- → How do I achieve the marbled effect?
Dollop the remaining carrot batter on top of the cheesecake layer and gently swirl with a knife before baking to create a marbled appearance.
- → What is the best way to store these bars?
Keep the bars refrigerated in an airtight container for up to five days to maintain freshness and texture.
- → Can raisins be added to the bars?
Yes, adding a quarter cup of raisins to the carrot batter enhances the flavor with a subtle sweetness and chewy texture.
- → How do I get the frosting spreadable?
Beat cream cheese and butter until creamy, then gradually mix in powdered sugar and vanilla. Add 1–2 teaspoons of milk as needed to reach a smooth, spreadable consistency.